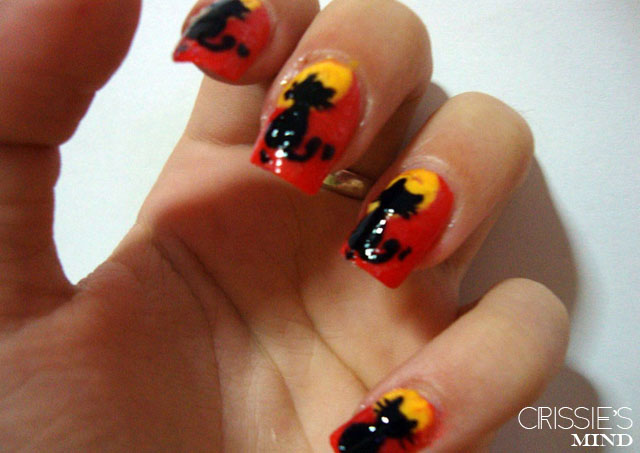
[For today, I had to make cats. =^.^=]
Mai întâi o să vă arăt poze cu modelul, după care vă arăt şi un tutorial rapid. Nu am mai făcut imagine în Photoshop deoarece nu am considerat că mai e necesar. Din păcate, pozele nu sunt făcute în lumina naturală şi nu sunt atât de clare pe cât mi-aş fi dorit, deoarece orice aş face, niciodată nu-mi dozez timpul eficient, şi a trebuit să fac modelul foarte târziu, respectiv seara.
[Firstly, I will show you pictures of the design, after that, I will also make a quick tutorial. I haven't made a Photoshop tutorial because I haven't considered it was necessary. Unfortunately, the pics weren't taken in natural light, so they aren't as clear as I wish they were, because, no matter what I do, I never succeed in distributing my time in an efficient way, and I had to make the design very late, in the evening.]
Sper să vă placă.
[Hope you'll like it.]
PS - Aţi observat că mi-am scurtat unghiile?
[PS - Did you notice I cut my nails shorter?]


Si micul tutorial.
[And the tutorial.]
1. Ca la tutorialul precedent, cel cu dovleacul de Halloween, aplicaţi o ojă postocalie pe întreaga unghie.
[1. Like in the previous tutorial, the Halloween pumpkin one, you have to paint your nails with an orage nail polish.]

2. Cu galben, desenaţi luna (nu ştiu dacă v-aţi dat seama, dar chestia galbenă cică e o lună ^^ ).
[2. With a yellow nail polish, draw the moon (I don't know if you figured out, but the yellow thing is supposed to be a moon ^^ ).]

3. Desenaţi nişte pisici pe fiecare unghie. Eu le-am făcut pe folie, după care le-am lipit pe unghie. Sper ca în viitorul apropiat să pot face un toturial în legătură cu această tehnică, pentru cei care nu o cunosc încă.
[3. Draw a cat on each nail. I drew them on something like a plastic sandwich bag, after that, I applied them on my nails. In the future, I hope I will have time to make a tutorial on this technique.]

4. Aplicaţi top coat şi sunteţi gata!
[4. Apply top coat and you're done!]

they are so cute <3333
ReplyDeletethank you :)
Delete